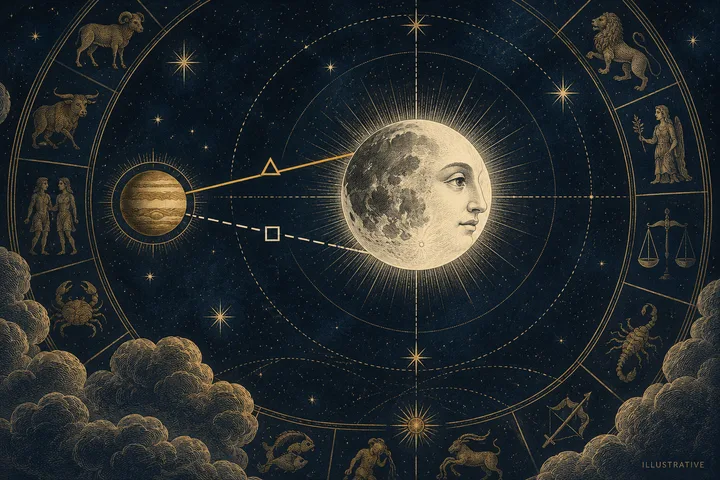
What should you compare before interpreting two Moon-aspect labels?
When two Moon-aspect labels seem to describe the same partner, start with the chart rows, not the interpretations. Write down the point on your chart, the point on your partner’s chart, and the sign and degree shown for each. Then check whether both rows name the same two points. “Your Moon trine his Venus” and “your Moon square his Saturn” describe two different pairs; “your Moon square his Venus” and “your Moon trine his Venus” claim two different angles for one pair. That distinction changes the question you’re trying to answer. The first case may be a real layered pattern. The second calls for checking the chart data and settings before assigning either meaning. An aspect is a measured distance between chart points, as “An Introduction to Aspects and Chart Shaping in Natal Astrology” explains. So the label needs to match the points and geometry that produced it.
Next, note the degrees, the aspect set the chart displays, and the orb rule it uses. An orb is the permitted distance from an aspect’s exact angle; the reference describes different allowances, so don’t assume every chart uses the same cutoff. Under one consistent, narrow major-aspect rule, a single pair has one angular separation. It can’t be both a square and a trine when those exact targets are distinct. The detailed geometry belongs to the next step; for now, treat conflicting labels as a prompt to verify the method, not as two emotional messages to combine. If the rows name different partner planets, keep both contacts in view and read them separately once their points and degrees check out. If degrees are missing, don’t rank the contacts by exactness. Keep the reading to what the supplied placements support, then confirm the missing information if you need a degree-based comparison. This first check settles what you’re actually comparing; it doesn’t decide what the relationship means. This matters when you’re comparing placements you already know: each label describes a particular pair, not a free-standing message.
Sources: An Introduction to Aspects and Chart Shaping in Natal Astrology
What does an aspect label actually compare?
A synastry aspect links two named positions from different charts. Here, one is your Moon; the other belongs to your partner. The chart row should identify both points, not just show a symbol or short label. “Moon square Saturn” names a different pair from “Moon square Venus.” The aspect word describes the geometry between positions. Read the point names to see which pair the chart compared.
An aspect is measured as an angular distance around the zodiac. An Introduction to Aspects and Chart Shaping in Natal Astrology defines an aspect as the precise distance between two horoscope points and lists five major aspects: conjunction, sextile, square, trine, and opposition. Their exact angles are 0, 60, 90, 120, and 180 degrees. The source also distinguishes minor aspects, including the semi-sextile, semi-square, sesquiquadrate, and quincunx. A chart may display a set or give these less emphasis. Check which aspect list it uses; a minor-aspect label is not another name for a major one.
An orb is the allowed distance from the exact angle. Positions close to the exact angle form a close or tight aspect; a contact farther away, but still within the chosen allowance, is wider. The same reference explains that orb means the distance a planet may deviate from an exact aspect. It notes that conventions differ: some vary the allowance by aspect, while traditional techniques can also account for the planets involved. Its example values are not a universal rule for every synastry reading. Without degrees or the chart’s orb setting, you cannot judge how exact a labeled contact is.
Sign placements add another layer. They describe where each point sits in the zodiac and can shape the symbolism of a reading. But signs alone do not give the measured angular separation or its orb. An Introduction to Aspects and Chart Shaping in Natal Astrology discusses aspects in “dissociate” signs, where the measured aspect connects signs outside their usual sign-based relationship. The guide treats this as a more varied interpretive case, not a reason to erase the geometry. Note the signs, then verify the degree-based contact.
A natal aspect connects points within one person’s chart. In synastry, the points come from two charts, so their identities and owners matter: your Moon, your partner’s planet. Aspects Between Charts advises considering both planets’ roles and their sign and house placements when interpreting interchart contacts. That context helps after you confirm which points meet. A house layer belongs only where chart data support it; an aspect label alone cannot supply it.
When you inspect a chart grid, copy the full row: both point names and chart owners, the aspect name, and the degrees if shown. Record the signs separately, along with the chart’s major or minor aspect setting and stated orb convention. Then you can tell whether a row describes your Moon and the same partner planet as another row, a different partner planet, or another kind of contact. A sign pairing, point label, and aspect are related parts of a chart, but each answers a different question.
Sources: An Introduction to Aspects and Chart Shaping in Natal Astrology; Aspects Between Charts
Can one pair make two major aspects at once?
A single pair of chart positions has one angular separation. It may sit near the exact angle for a square, a trine, or another aspect, but it cannot occupy two different exact angles at once. That check helps separate a chart-reading problem from a real pattern: first ask whether both labels name your Moon and the same planet belonging to your partner. If they do, compare the degrees and the settings before giving either label meaning. If they name different planets, each pair has its own separation and both contacts may be genuine. The aspect reference An Introduction to Aspects and Chart Shaping in Natal Astrology lists the square at 90 degrees and the trine at 120 degrees. Those targets are 30 degrees apart. The same reference defines an orb as the distance a position may deviate from an exact aspect. Put those ideas together and the six-degree rule used by this report has a boundary: a separation cannot be within six degrees of both a square and a trine. To be within six degrees of the square target, it must lie from 84 to 96 degrees; to be within six degrees of the trine target, it must lie from 114 to 126 degrees. The ranges do not overlap. Consider an illustration, not a personal chart. If two positions are separated by about 90 degrees, the square is the relevant major-aspect target under this rule. The separation is still about 30 degrees from the trine target, far beyond the allowed six-degree orb. Moving the separation closer to the trine would also move it away from the square. The point is not that one aspect should be preferred for emotional reasons. It is that the measured geometry determines which label fits before interpretation begins. This conclusion depends on the stated orb convention. A system with a broad allowance could overlap the ranges around two aspect targets and display both labels for one pair. That would reflect its classification choice, not two separate angular separations. The underlying positions have not changed. So check the chart's aspect list and orb settings rather than assuming that every program applies the same limits. Also check what kind of label you are reading. The reference distinguishes major aspects, including square and trine, from minor aspects such as the semi-square and quincunx. A display that includes minor aspects may show two different relationships for one pair, but that is not the same claim as saying the pair makes both a square and a trine. Sign-only language can describe a broad sign relationship; it does not by itself establish the degree separation or orb. Keep those layers distinct. If one row says square and another says trine for the same two points, write down the point names, degrees, aspect set, and orb rule. Recheck the single separation against each exact target. If the labels still conflict under one consistent narrow rule, ask how the chart source produced them. You can then correct a duplicate classification without discarding another verified contact elsewhere in the chart.
Sources: An Introduction to Aspects and Chart Shaping in Natal Astrology
Which orb rule should govern the comparison?
An orb is the distance between the measured separation of two chart points and the exact angle named by an aspect. If a pair lies 4° from the exact square, its square has a 4° orb. The positions have not moved when you change the allowed orb; only the rule for calling that square active has changed. This distinction matters when two chart displays disagree. One may include a wider contact, use a different aspect list, or apply different allowances to particular planets. The underlying degrees remain the same, while the label reflects the method. Choose the rule before comparing the rows, then apply it to both. Under a fixed six-degree cutoff, a contact within 6° of its exact aspect angle qualifies for that comparison, and a contact farther away does not. That cutoff is the Synastry Comparison Report’s stated setting for selected major aspects. It gives the reader a consistent boundary; it does not establish a universal astrological law. A different astrologer may use another declared convention. What matters for this comparison is that both contacts face the same test, so “closer” and “within orb” mean the same thing in each row. Orb practice has varied across astrological traditions. In “The Classical Origin and Traditional Use of Aspects,” Deborah Houlding describes historical approaches that assigned orbs to planets, used the combined allowances of two planets, or applied a shared allowance to aspects. She notes that some astrologers used 12° or 15° for all aspects, while others preferred 6°; the article also describes a later shift toward simpler aspect-based orbs. These examples show why a chart’s settings deserve attention. They don’t tell every modern reader which convention to choose, and they aren’t interchangeable with this report’s six-degree rule. Compare chart outputs in order. Check that both rows name the same points and degrees, then compare aspect lists: one display might include minor aspects another omits. Check for planet-specific limits, a shared cutoff, or rounding near a boundary. Finally, recalculate each distance from its exact target using one convention. “An Introduction to Aspects and Chart Shaping in Natal Astrology” distinguishes exact aspect angles from looser contacts admitted within an orb; Houlding’s history shows that the permitted range has varied. Suppose one chart lists a wide Moon–planet square and another leaves it out. If the points and degrees match, the cutoff may explain why; neither display changed the separation. If two labels appear for one pair, ask whether the chart deliberately uses broad, overlapping allowances or mixes settings. Under one narrow rule, only a label that passes belongs in the comparison. Keep the convention visible in your notes: “major aspects, six-degree orb,” or whatever rule you have chosen. Then compare the surviving contacts on equal terms. That simple discipline lets you reconcile different chart outputs without treating a setting as a change in the relationship’s symbolism.
Check the point names first: your Moon, your partner’s planet, and whether both rows use the same points. Then compare the degrees and the chart’s aspect and orb settings. One pair has one angular separation, so it cannot be both a square and a trine under one consistent major-aspect rule. If the rows name different partner planets, both contacts may be valid and deserve separate readings. Without reliable degrees, don’t rank contacts by exactness.
Sources: The Classical Origin and Traditional Use of Aspects; An Introduction to Aspects and Chart Shaping in Natal Astrology
What changes when the second label belongs to another planet?
A second label changes the reading only when it belongs to a second point pair. If your Moon has a verified aspect to your partner's Venus and another to their Saturn, those are two contacts. Each connects a different planetary function to the same lunar position. That is a layered pattern, not one contact wearing two names. Check the chart rows. Do they identify your Moon and the partner's Venus in one row, then your Moon and their Saturn in another? Compare each contact's aspect, distance from exactness under the stated orb rule, and the signs shown for both points. If both rows name the same partner planet, return to the point-pair check. Different labels alone don't prove there are two contacts. One pair and two pairs pose different questions. One pair asks whether a measured relationship has been labeled consistently. Two pairs ask how distinct planetary symbols relate to the Moon. Cafe Astrology's “Aspects Between Charts” treats interchart aspects by the planets involved and advises considering both planets' roles along with sign and house context. Read the whole pair, not an aspect word in isolation. Consider this example. Imagine your Moon has one verified contact from your partner's Venus and a separate contact from their Saturn. In a symbolic reading, Venus brings its own themes to the Moon connection, while Saturn brings different ones. Geometry matters too; each aspect describes a different relationship between the points. Skyscript's “Aspects involving the Moon” guide sorts interpretations by aspect and planetary partner. A Moon-Venus contact and a Moon-Saturn contact shouldn't be collapsed into a generic “Moon aspect.” Yet the page discusses natal aspects. Its descriptions offer symbolic vocabulary, not a ready-made account of what either person feels in synastry. Interpret the actual cross-chart pair in context. Compare the contacts without turning them into votes. An aspect often described as easy doesn't cancel one often described as tense; nor does a tense contact erase a supportive one. Ask what each contributes, whether the geometry repeats or contrasts, and which is closer under one consistent orb rule. Closeness can guide emphasis within that convention. It can't make one aspect the whole chart or tell you how the relationship must unfold. The strongest exception is an apparent pair of contacts that isn't actually two. A site may list different points, mix aspect sets, or apply another orb rule. Verify names and settings before combining interpretations. Lookup the Stars' “Understanding Moon Aspects in Synastry” surveys Moon contacts by aspect and planetary partner, a useful map of symbolism. But a catalogue doesn't establish that two labels in a particular chart are valid. Point identities and the stated method have to do that work. Keep two verified contacts as two lines of inquiry: name the partner planet, note the geometry, and read each link to the Moon before synthesizing. If the second label names a different planet, preserve the added layer. If it names the same planet and pair, verify the calculation first. An aspect count isn't a score or verdict.
Sources: Aspects Between Charts; Aspects involving the Moon; Understanding Moon Aspects in Synastry: A Deep Dive into Emotional Connections
How should you rank two verified contacts to the Moon?
Once both contacts pass the point-and-degree check, rank them in this order: trust the placements first, compare each orb under one rule, read the aspect geometry, then consider the partner planet’s symbolism, signs, and reliable natal context. A close aspect is not a verdict about the relationship. Start with the placement data. Check that the Moon and both partner planets come from reliable chart records, and note whether degrees are rounded or estimated. If one point is uncertain, qualify that contact first. A precise-looking label cannot lend certainty to shaky inputs. Next compare distance from exactness under the same declared orb convention. An orb is the distance between the measured angle and the aspect’s exact angle. “An Introduction to Aspects and Chart Shaping in Natal Astrology” describes closer aspects as stronger and notes that some traditional approaches let the planets involved affect the orb. Give the tighter contact more emphasis within that method, while keeping the wider one in view. Don’t change the orb for one row. Then read the geometry. A conjunction joins planetary influences; a sextile and trine are commonly described as easier flows; a square suggests tension; an opposition can bring resistance or a pull between poles. They are starting points, not grades. The reference notes tension can prompt development, while ease can be taken for granted. Ask what exchange the geometry describes. Now consider the partner planet’s role in the contact. Here the Moon is the focus, meeting another planet’s mode of expression. “Aspects Between Charts” advises considering each person’s role in the interaction, plus both planets’ signs and houses. “Aspects Between the Moon” also varies its interpretations by planet and aspect, then points to sign and house for refinement. A Venus contact and a Saturn contact bring different planetary functions, even if their aspects share a broad category. Imagine, purely as an illustration, that the partner’s Venus makes a closer verified trine to your Moon while their Saturn makes a wider verified square. The trine may lead for exactness; the square remains distinct, with another planetary tone. Neither cancels the other. This comparison doesn’t tell you what either person intends or whether the relationship will last. An aspect tally can’t answer that. Bring in signs and natal context after this ranking. Signs refine planetary expression; houses add a life-area setting when supported by the data. But “Aspects Between the Moon” describes natal aspects. Its symbolism can inform a synastry reading, yet it isn’t a ready-made account of what one person will do to another. Synastry asks how two charts meet. Test the symbolism against the placements and broader chart. The verdict is simple: give first weight to the contact with the most secure data and closer orb under one shared convention, then interpret its geometry and planetary roles. Keep the second verified contact as its own thread, especially if it brings another planet or aspect quality. When both contacts are equally reliable, compare what each adds and where their meanings pull in different directions. Prioritize without turning exactness into destiny or aspect type into a compatibility formula.
Sources: An Introduction to Aspects and Chart Shaping in Natal Astrology; Aspects involving the Moon; Aspects Between Charts
What can you conclude when information is missing?
When chart details are missing, keep the reading at the level the available details support. If you know both signs but lack reliable degrees, you can compare broad sign symbolism. You can’t confirm the exact angular separation, calculate an orb, or rank contacts by closeness. If the Moon’s sign or degree is uncertain, pause before making a Moon-specific claim. Don’t fill in houses from a guess. This is an input question before it is an interpretation question. First confirm which two points the chart row names. Then ask whether the signs and degrees are known and whether the chart’s settings are clear. A missing degree doesn’t erase a known sign placement. It limits what you can say about an aspect’s exactness. If the point identity is uncertain, you can’t tell whether you have one contact or two separate ones. An aspect is a measured distance between chart points. “An Introduction to Aspects and Chart Shaping in Natal Astrology” defines it by that precise distance and distinguishes exact angles from the orb allowed around them. Without degrees, you don’t have the measurement needed to test a degree-based label. You may reflect on the signs involved, but don’t present that reflection as proof that a square, trine, or other named aspect is close. Sign symbolism and degree geometry answer different questions. Use an uncertainty ladder. First, identify the points and whose chart each belongs to. Next, work with sign symbolism only if those signs are stable and known. Then use verified degrees and one stated aspect-and-orb rule to assess geometry and closeness. Add house interpretation only when chart data support those placements. The ladder doesn’t make a sign reading worthless; it keeps each conclusion in proportion to its inputs. “Aspects Between Charts” advises readers to consider the signs and houses of planets involved when interpreting interchart contacts. This shows why a partial chart can still offer context, while marking what remains unavailable. That page gives general synastry guidance; it doesn’t turn absent house data into a usable placement. If house information is absent, leave that layer open rather than assuming one. If the Moon position hasn’t been verified, don’t build a degree-sensitive comparison on it. Return to what is known. The Synastry Comparison Report works from placements you supply, with optional degrees, and checks selected major aspects using its six-degree rule. It doesn’t calculate natal placements from birth details or supply houses. It can help organize information you have, but it can’t recover an omitted degree or settle an uncertain Moon position. Confirm the source chart’s point names, signs, degrees, and settings. If only signs are available, keep the reading at sign level; if degrees are confirmed, compare contacts under one consistent rule. That boundary preserves the useful part of the reading without asking missing data to say more than they can.
Sources: An Introduction to Aspects and Chart Shaping in Natal Astrology; Aspects Between Charts; Synastry Comparison Report
What should you check next?
Start with the chart rows, not their interpretations. Copy the two point names, including which chart each belongs to. Record the signs, available degrees, aspect labels, and the chart's orb and aspect settings. Then ask: do both rows describe your Moon and the same partner planet, or does the second name a different planet? If one pair has two major-aspect labels, compare its single separation with each exact angle under one consistent orb rule. Keep the label supported by that method; ask how the chart produced the other if its settings are unclear. If two different partner planets each contact your Moon, retain both and read them as separate layers. A count of labels doesn't settle the relationship. Match the strength of your reading to the information available. Signs guide a broad comparison. Degrees let you assess aspect geometry and closeness under the stated orb. If a degree is missing or uncertain, don't rank contacts by exactness. Confirm the placement or stay with sign-level reflection. The Synastry Comparison Report compares placements you supply, with optional degrees, and checks selected major aspects within its six-degree orb. It doesn't calculate natal placements from birth details or supply missing data. Use it to compare known placements, then decide what details you still need.
Sources: Synastry Comparison Report
A little more clarity
Can the same partner planet make both a square and a trine to my Moon?
One pair of chart positions has one angular separation. Under the report’s six-degree major-aspect rule, that separation cannot be both a square and a trine because their exact targets are 30 degrees apart. A method with unusually broad, overlapping orbs could display both labels, so check its stated settings.
Can I compare two Moon contacts without exact degrees?
You can compare broad sign symbolism if the signs are known and reliable. Without degrees, you can’t confirm the angular separation, calculate an orb, or rank the contacts by exactness. Keep the reading at the level the available placements support.
Sources & further reading
- An Introduction to Aspects and Chart Shaping in Natal Astrology
Defines aspects as angular distances, lists distinct major-aspect targets, explains orbs, and discusses sign and degree geometry.
- The Classical Origin and Traditional Use of Aspects
Documents historical variation in orb allowances and methods, supporting the need to state and apply one convention consistently.
- Aspects Between Charts
Advises considering both planets’ roles and their sign and house context when interpreting interchart aspects.
- Aspects involving the Moon
Organizes Moon interpretations by aspect and planetary partner and describes sign and house context as refinements.
- Understanding Moon Aspects in Synastry: A Deep Dive into Emotional Connections
Surveys Moon contacts by aspect and planetary partner; used to distinguish a symbolism catalogue from chart-input verification.
- Synastry Comparison Report
The saved product scope says the report compares supplied placements and optional degrees, checks selected major aspects within six degrees, and does not calculate natal placements from birth details or houses.
Synastry Comparison Report
Enter known placements for two people. Get an input-by-input comparison, selected aspect calculations and a clear record of what remains uncertain.
Compare our placements